Staying active and healthy during pregnancy can do wonders for you and your baby. Unless your doctor tells you otherwise, indulging in different forms of exercise such as jogging, walking, and basic strength moves can prove beneficial for you.
Along with these exercises, doctors recommend yoga for pregnant women since it combines both stretching and strengthening, which can be beneficial. A study conducted in 2014 revealed that pregnant women who practised yoga felt stronger and had better overall health.
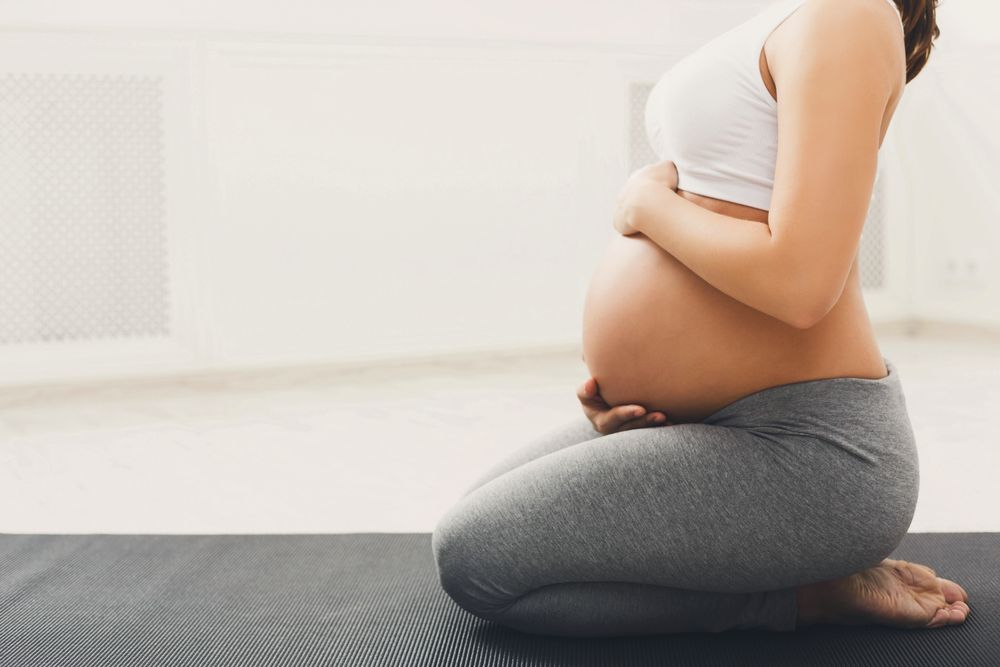
The Benefits of Yoga During Pregnancy
A key ingredient to having a healthy and happy pregnancy is doing prenatal yoga. Here are a few benefits of yoga during pregnancy:
- It prepares your body for labor and delivery
- It strengthens the important muscle groups to support the physical changes your body goes through
- It helps promote the connection between you and your baby
- It provides relief from some common pregnancy problems such as lower back pain, insomnia, shortness of breath, and nausea
Here are easy yoga poses that you can do to adapt to a healthier pregnancy:
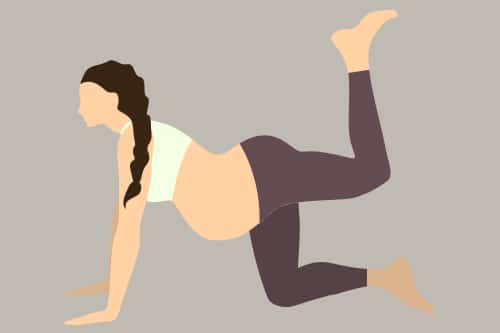
Yoga for Pregnant Women in the First Trimester
During the first trimester, you will experience fatigue because of all the physical changes your body will go through. Practising some simple yoga poses can help provide relief from fatigue.
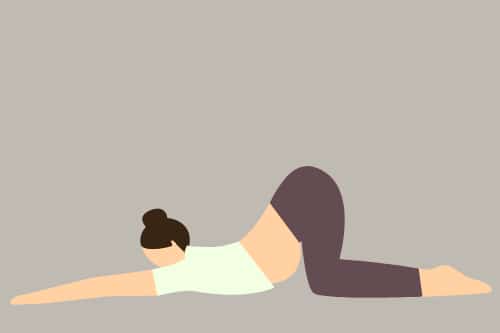
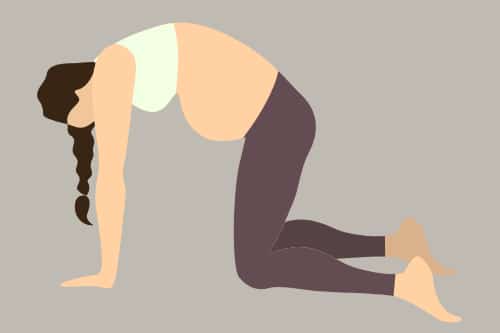
#1 Unicorn and rainbow pose
The cat-and-cow pose also helps strengthen and maintain the flexibility of your abdomen and lower back.
How to do:
- Maintain a position with all your fours on the ground
- Keep your hands at the width of your shoulder and knees at the width of your hips
- Inhale and lift the breastbone and the tailbone towards the sky while slowly contracting your lower back
- Exhale and bend your spine in the shape of a rainbow
- Repeat it about 15 times
If needed, you can use a folded cloth or towel under your knees to cushion them.
Yoga for Pregnant Women in the Second Trimester
Nausea and fatigue levels usually drop down during your second trimester of pregnancy. This trimester is the time for you to increase your exercises and yoga to build the strength needed during the later stages of pregnancy and delivery.
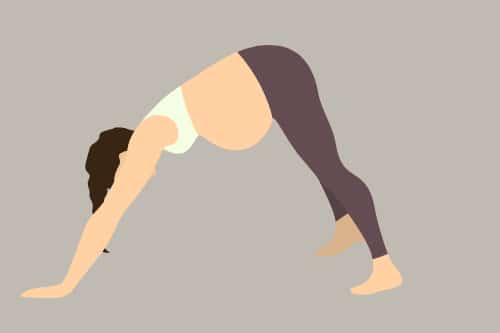
#1 Extended puppy pose (Uttana Shishosana)
This easy yoga pose helps stretch your upper back, shoulders and spine. It also helps release chronic tension in your neck and shoulders.
How to do:
- Get on the yoga mat with all your fours on the ground. Make sure your toes are pointing straight back
- Keep your feet parallel and at the width of your hips
- Slowly walk your hands out in front of you
- As you gently release your forehead to the yoga mat, let your chest melt towards the floor
- Create a lifting action and intertwine your fingers together. Bring your upper arm in an outward position to broaden your shoulders
- Gently lift your elbows off the mat while keeping your arms active
- Inhale and deepen the stretch by reaching your hips in an outward position. At the same time, let your chest melt towards the yoga mat
- Maintain the pose for about 5 to 10 seconds and take deep breaths
- Release
- Repeat it about 10 times
Ensure you do not let your knees spread wider than your hips, as it can lead to compression in your lower back.
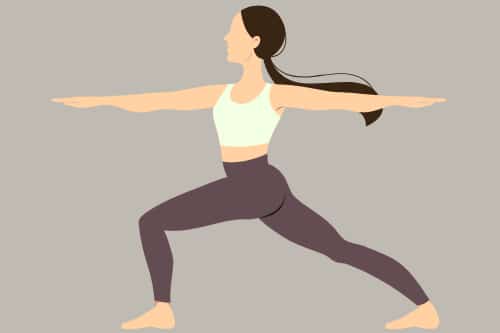
#2 Reverse warrior pose (Viparita Virabhadrasana)
The reverse warrior pose is beneficial in strengthening your torso, arms, shoulders, hips and quads. It also opens your chest and shoulder and improves flexibility in your ankles, inner thighs and spine.
How to do:
- Maintain a mountain pose with your feet at the width of your hip and arms on your side
- Turn to your left and align your heels while stepping both feet at a width of 4 to 5 feet apart
- Turn the right foot out at an angle of 90 degrees and point your toes to the top of the yoga mat
- Bring your left foot slightly inwards and back toes at an angle of 45 degrees
- Raise your arms to the height of your shoulders. Make sure your palms face downward
- Bend the front knee and exhale. Keep your knees over the ankle of your front foot. Ensure that the front shin is perpendicular to the floor
- Sink your hips low while bringing the front thigh parallel to the floor
- On your next exhale, take your left hand to the back of your left thigh. As you inhale, gently lift your right arm up while reaching your fingertips towards the ceiling
- Keep your front knee in a bent position and hips in a low position. Slowly slide the hand at the back down your leg. Gently tilt your head and look towards your right hand’s fingertips
- Maintain the position with your chest lifted, shoulders relaxed, and sides of your waist long. Hold it for about 10 to 20 seconds and release
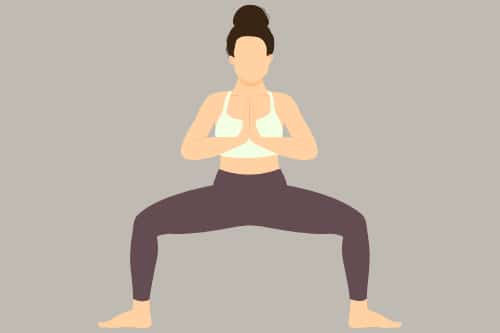
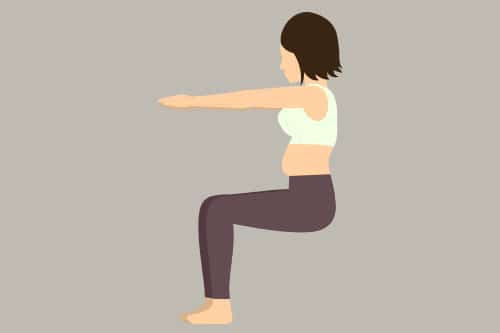
#3 Goddess pose (Utkata konasana)
The Goddess pose strengthens your lower body. It emphasises particularly on your inner thighs and helps build strength in the core stabilisers.
How to do:
- Stand in a straight position. Keep your legs at the width of your shoulders
- Allow your hips to face outward and ensure your feet are turned at an angle of 45 degrees. Make sure both your knees are turned in an outward position
- Inhale while keeping your back stretched. Slightly bend your knees to a 90 degrees angle while maintaining your toes in an outward position
- Exhale while maintaining the position. Emphasize the strength in your inner thigh as you get back in the initial position. Your abs will help provide you with additional core stabilization
If you find difficulty keeping your upper body straight, you can use a chair as a ballet bar and keep your hands on its back for support.
#4 Lower back and hip stretch
This pose helps stretch and strengthen your lower back and the outer hip.
How to do:
- Use a chair for this pose
- Keep your arms straight and place your hands on the chair
- Bring your left foot on top of your right thigh in a cross position. Bend your right knee and slowly sit back on your hip
- Elongate your spine while maintaining the correct posture at the back of your body. Breathe and feel the muscles beginning to release
- Let the stretch be for a maximum of 90 seconds
- Change sides and repeat
This pose is perfect for releasing the tension from the lower back of your body. It can also be practised by new mothers who experience lower back pain.
Yoga for Pregnant Women in the Third Trimester
Many yoga poses for the third semester are similar to what you practice in the first and second trimesters. The only difference is these poses will be focusing more on the pelvic floor muscles.
#1 Standing lateral stretch (Ardhakati Chakrasana)
This move helps stretch the side muscles of your body (obliques, intercostals, latissimus dorsi).
How to do:
- Maintain a straight position with your feet at the width of your hips
- Take your arms over your head
- Intertwine your fingers while turning your palms upwards
- Inhale and stretch your spine while reaching up through your arms
- Exhale while slightly bending over to your left
- Take a few deep breaths on your left
- Return to the initial position and reestablish balance
- Change sides and repeat
You can also use a yoga belt to bring your hands together.
#2 Wall squat
Wall squats help strengthen the legs, hips, and core stabilisers.
How to do:
- Place a stability ball against a wall at your lower back’s height
- Turn your back towards the wall so that your body gently rests on the ball
- Keep your feet at the width of your hips
- Inhale and slowly squat down while keeping your knees at a 90 degrees angle. When you do this, the ball will roll up to your upper back
- Pay attention to your pelvic floor muscles stretching in directions at the bottom of your movement
- Exhale and return to the initial position
- Repeat it about 15 times
You can use a block between your thighs to maintain proper alignment in your knees.
#3 Kneeling hip abduction
The kneeling hip abduction helps strengthen outer thighs and stabilise your core.
How to do:
- Begin this pose by kneeling on the floor. Make sure the right side of your body lies on the stability ball
- Place your right forearm on the ball and your right knee on the ground
- Extend your left leg straight and rest your left hand on your left hip
- Exhale and gently lift your leg till it aligns parallel with the ground
- Inhale and gently bring your leg down
- Repeat it about 15 times. Change sides
You can touch the tip of your toe on the ground if you feel you are losing your balance. Keep your foot on the ground for a while and find your balance before continuing with the pose.
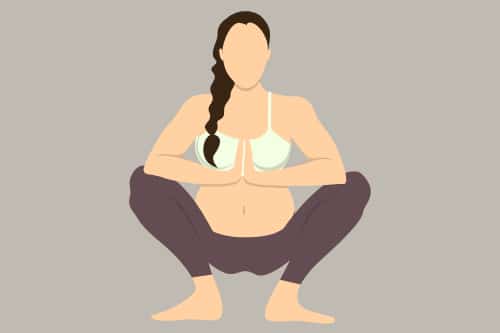
#4 Garland pose (Malasana)
The garland pose will assist you with your stability to squat. It will strengthen your hips for the labour and delivery procedure. It also works as a hip-opener and improves the range of motion in your hip joints.
How to do:
- Maintain a mountain pose
- Keep your feet wider than your hip-width
- Keep your hands folded at your heart and turn your toes at an angle of 45 degrees
- Squat down as much as possible. Make sure your hips hover a little higher than the ground
For extra support, you can use multiple folded blankets under your sit bones (ischial tuberosities). It may be helpful if your heels do not touch the ground while doing a deep squat.
Conclusion
During all three trimesters, you must take plenty of rest while also ensuring you stay healthy and active. These yoga poses for pregnant women are simple and easy to practice. You can start by doing a few sets each day, and once you get the hang of it, you can practice them regularly.
Disclaimer: It is best to discuss with your doctor before performing the above-mentioned yoga poses.
Frequently Asked Questions (FAQs)
Q. Can yoga cause a miscarriage? A. Although there is no scientific evidence stating that yoga could cause a miscarriage, you must take extra care of yourself during your pregnancy, especially while performing yoga.
Q. Which yoga poses should be avoided during pregnancy? A. Intense abdominal yoga poses, such as the boat pose, should be avoided during pregnancy. It can put excess pressure on your abdominal and uterus.
Q. Can twist hurt the fetus in the uterus? A. Closed twists can strain your abdominal muscles, which are already compromised due to the abdomen stretching to accommodate the growing uterus. Excessive twisting while doing yoga can limit the fetus’ space and restrict the blood flow to the uterus.
Q. Can yoga poses that require crossing legs be performed during pregnancy? A. It is not advised to do yoga poses that require you to sit in a crossed leg position. It can cause birth complications, high blood pressure, and varicose veins.